
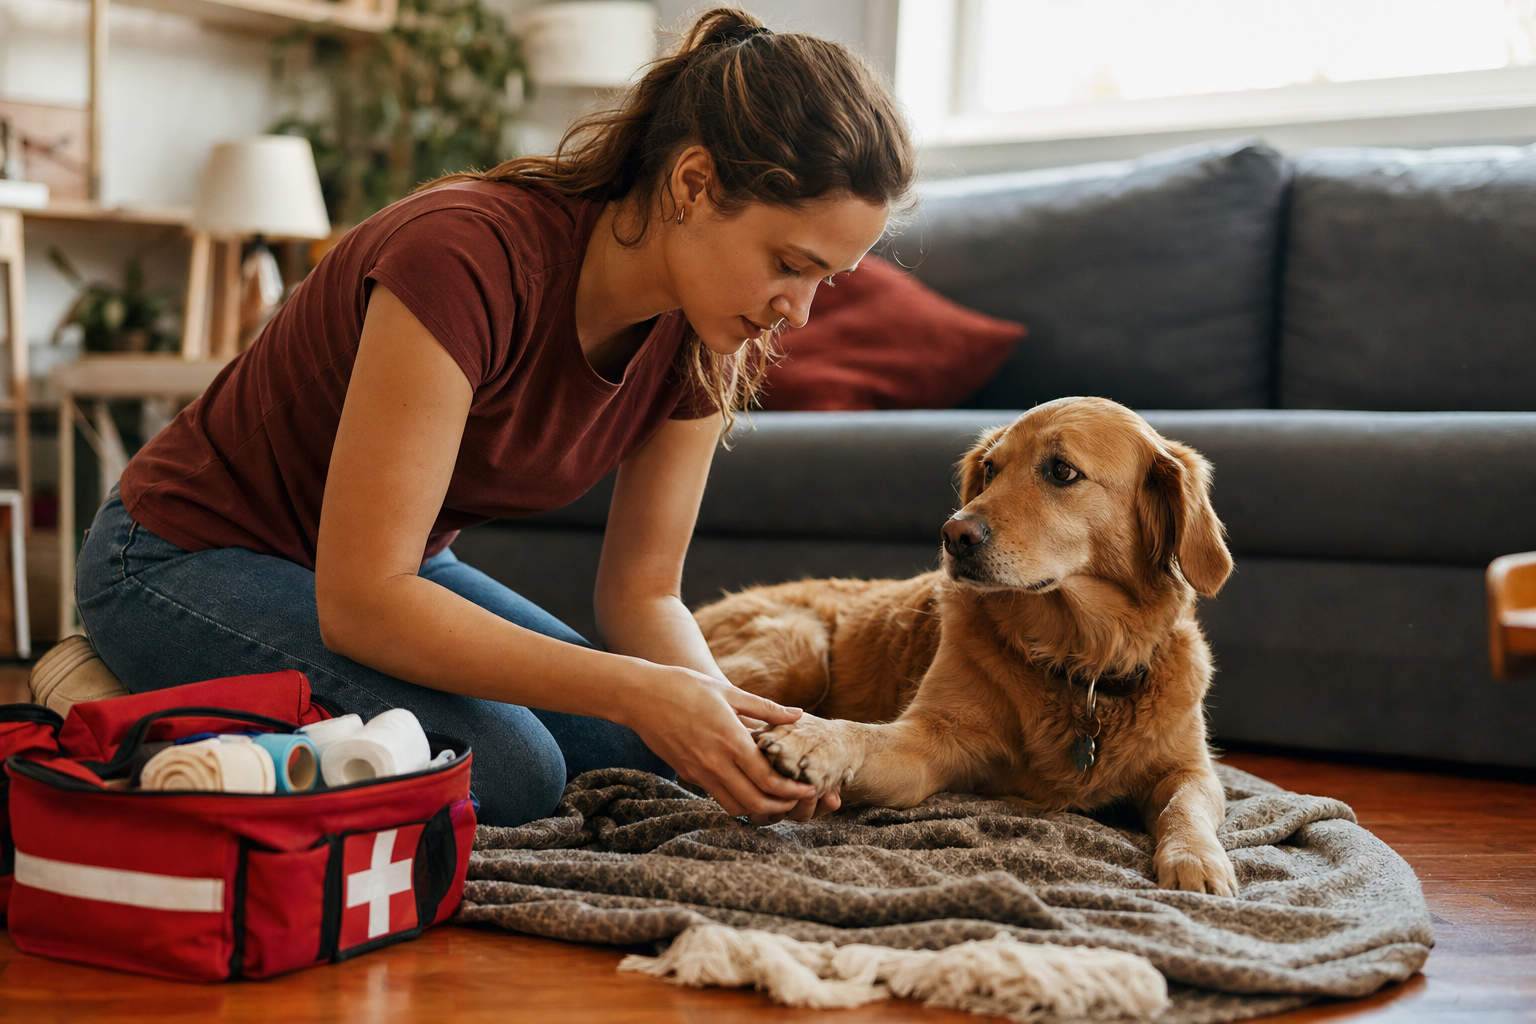
Being prepared with the right knowledge — and the right kit — can make all the difference in an emergency.
Let’s be honest — nobody wants to think about their dog getting hurt. But if you’ve ever watched your pup limp in from the yard, choke on a treat, or collapse out of nowhere, you know that panic hits fast. The good news? A little know-how goes a long way. First aid for dogs isn’t about replacing your vet — it’s about buying your dog precious minutes when seconds matter most.
In this guide, we’re covering everything: practical first aid tips for dogs, a step-by-step breakdown of how to perform CPR on a dog, and the exact contents of a well-stocked dog first aid kit. Bookmark this one — it’s the kind of article you hope you never need, but you’ll be so glad you have.
Why Every Dog Owner Needs First Aid Knowledge
Dogs are curious, clumsy, and occasionally reckless creatures. They eat things they shouldn’t, jump off things they shouldn’t, and somehow always manage to find the one sharp object in a five-acre field. Emergencies don’t wait for business hours, and the closest emergency vet might be 30-45 minutes away. That gap between “something’s wrong” and “we’re at the vet” is exactly where your first aid skills matter.
Knowing how to stay calm, assess the situation, and act correctly can:
- Stabilize your dog before you can get professional help
- Prevent a minor injury from becoming a life-threatening one
- Reduce your dog’s pain and anxiety in the moment
- Literally save your dog’s life in cardiac or respiratory emergencies
Essential First Aid Tips for Dogs
Before diving into specific scenarios, memorize this simple framework. It applies to almost every emergency situation you’ll encounter:
The C.A.L.M. Method
- Check the scene for danger before approaching (traffic, aggressive animals, downed wires)
- Approach slowly and speak in a soothing voice — an injured dog may bite out of fear or pain, even if they’re normally sweet
- Look for breathing, bleeding, consciousness, and obvious injuries
- Manage the injury with appropriate first aid, then transport to a vet immediately
Common Emergencies and What To Do
| Situation | What To Do | What NOT To Do |
|---|---|---|
| Cuts & wounds | Apply gentle pressure with clean gauze for 3-5 minutes; rinse with saline if dirty | Don’t use hydrogen peroxide directly on deep wounds — it damages tissue |
| Choking | Open the mouth, look for the object, sweep gently with a finger if visible | Don’t blindly jam fingers down the throat — you can push the object deeper |
| Suspected poisoning | Call the ASPCA Poison Control line or your vet immediately; bring packaging if possible | Don’t induce vomiting unless a vet specifically instructs you to |
| Heatstroke | Move to shade/AC, apply cool (not ice-cold) wet towels to belly and paws, offer small water sips | Don’t use ice water — it can cause shock by cooling too fast |
| Broken bone / limping | Restrict movement, muzzle if needed for safety, use a towel as a makeshift stretcher | Don’t try to “set” or splint the bone yourself |
| Seizures | Clear the area of furniture, time the seizure, keep hands away from the mouth | Don’t restrain the dog or put anything in their mouth |
| Bee sting / allergic reaction | Remove stinger if visible, apply cold compress, watch for facial swelling or trouble breathing | Don’t give human antihistamines without vet-approved dosing |
How to Perform CPR on a Dog: Step-by-Step
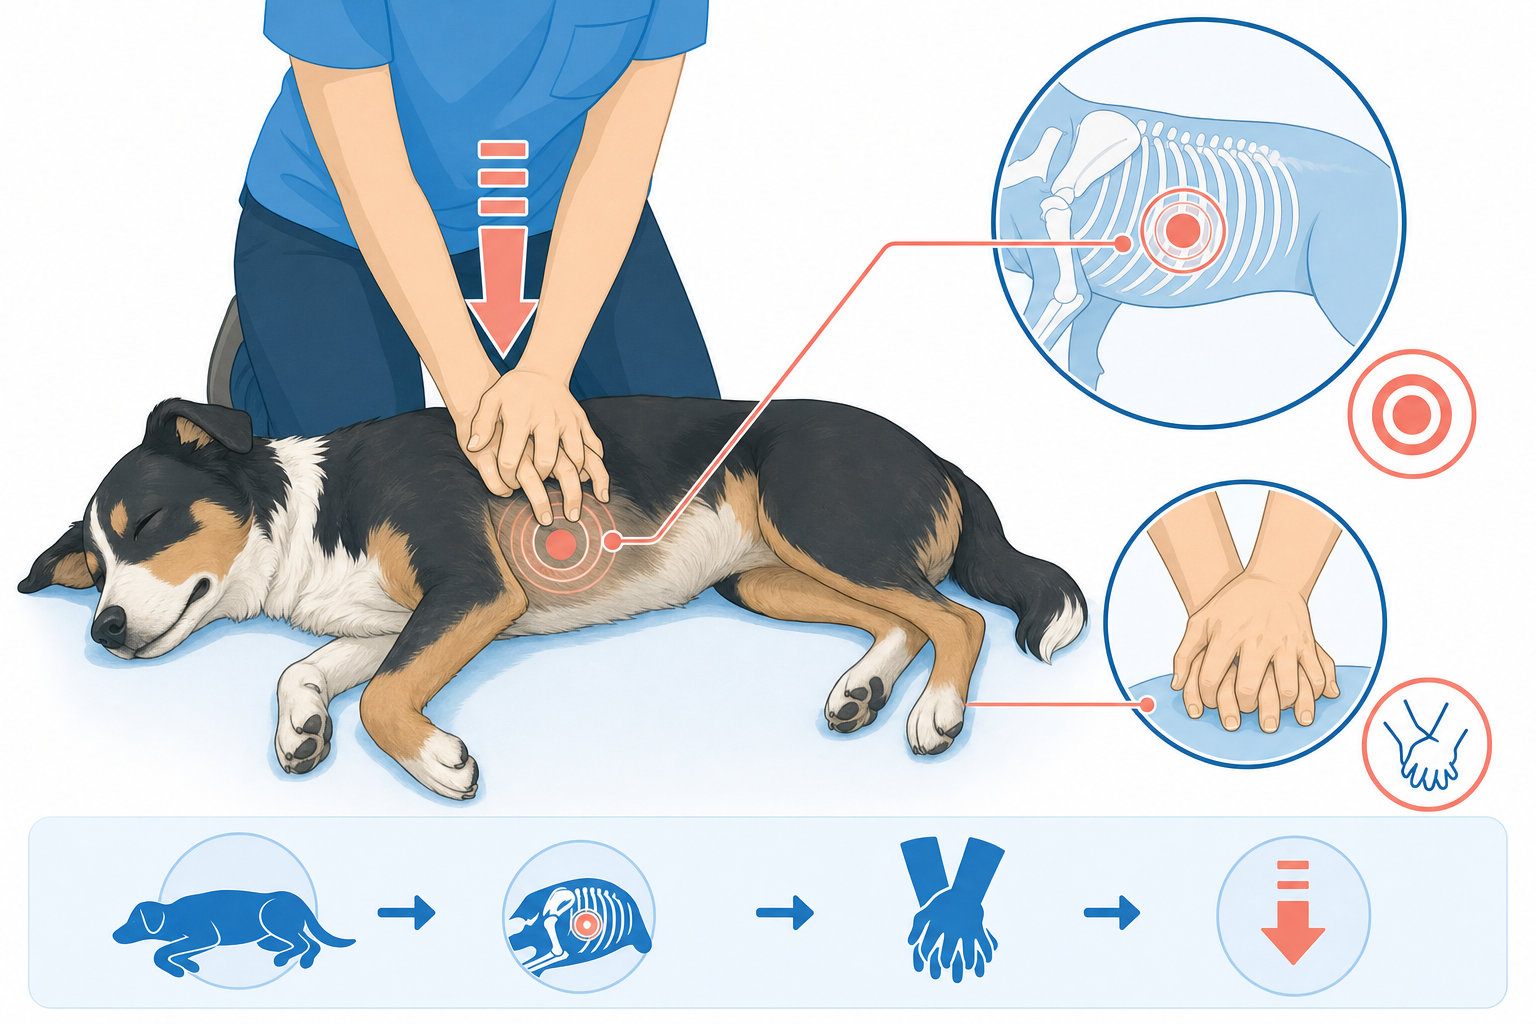
Correct hand placement is key: compress directly over the widest part of the chest, just behind the front legs.
This is the section you hope you never need, but it’s the one that matters most. Dog CPR (cardiopulmonary resuscitation) combines chest compressions with rescue breathing, and it’s only used when a dog is unresponsive and not breathing. Here’s exactly how to do it.
Step 1: Confirm the Emergency
- Check for responsiveness — call their name, gently tap their side
- Check for breathing — watch the chest for 5-10 seconds
- Check for a pulse — place fingers on the inner thigh where the leg meets the body (femoral artery), or listen/feel for a heartbeat behind the left elbow
If there’s no breathing and no pulse, begin CPR immediately.
Step 2: Position Your Dog
- Lay your dog on a flat, firm surface, on their right side
- For barrel-chested breeds (like Bulldogs or Cane Corsos), lay them on their back instead, since compressions work better directly over the sternum for these body types
Step 3: Chest Compressions
- Place the heel of one hand over the widest part of the chest (over the heart, which sits just behind the elbow of the front leg)
- Place your other hand on top and interlock your fingers
- Compress the chest about 1/3 to 1/2 of its width
- Push hard and fast — aim for 100-120 compressions per minute (think of the beat to “Stayin’ Alive”)
- Deliver 30 compressions before pausing for breaths
Step 4: Rescue Breaths
- Close your dog’s mouth gently and extend their neck to straighten the airway
- Seal your mouth completely over their nose
- Give 2 breaths, watching for the chest to rise
- Return to compressions — 30 compressions, then 2 breaths, repeating this cycle
Step 5: Keep Going
Continue cycles of 30 compressions and 2 breaths until your dog starts breathing on their own, you reach a veterinary hospital, or a vet professional tells you to stop. If possible, have someone else drive while you continue CPR in the car — every second counts.
What to Include in a Dog First Aid Kit
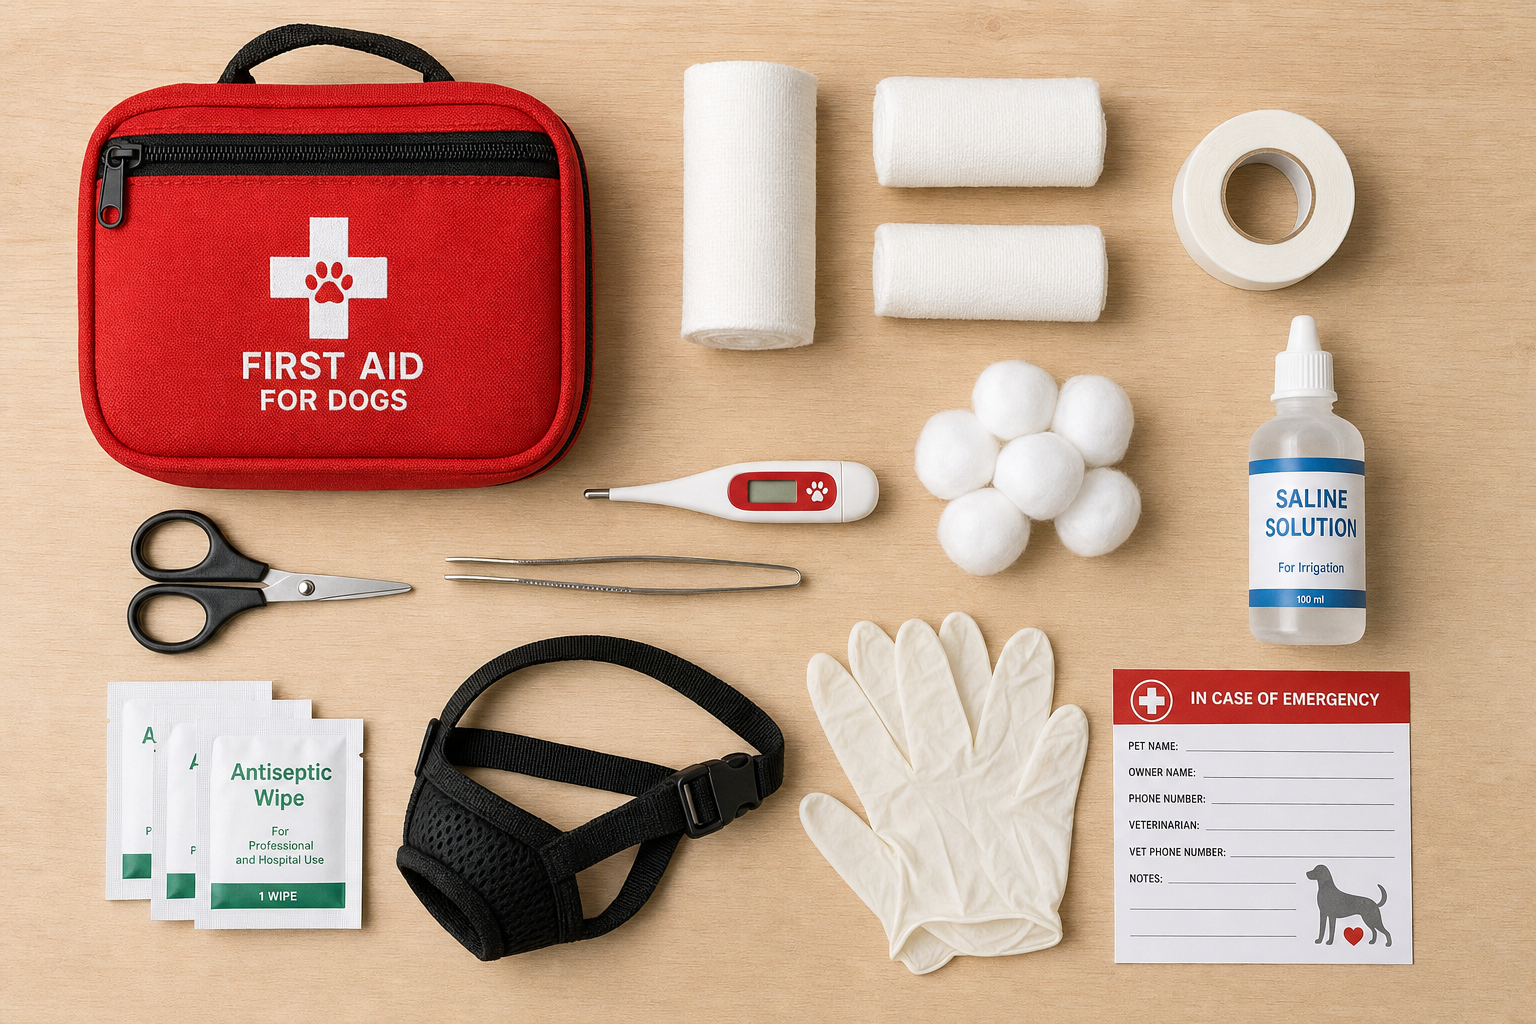
A well-organized dog first aid kit belongs in your home, your car, and your hiking pack.
You can buy a pre-made pet first aid kit online, but building your own means you know exactly what’s in it — and you can customize it for your dog’s breed, size, and known health issues. Here’s your complete checklist.
Wound Care Supplies
- Non-stick sterile gauze pads
- Rolled gauze (for wrapping wounds or muzzling in a pinch)
- Self-adhering vet wrap (sticks to itself, not fur)
- Adhesive medical tape
- Antiseptic wipes or spray (chlorhexidine-based, not alcohol)
- Saline solution (for flushing wounds and eyes)
- Cotton balls and cotton-tipped applicators
- Hydrogen peroxide (only used to induce vomiting when a vet instructs it — not for wound cleaning)
Tools
- Blunt-tip scissors (for cutting bandages or fur away from a wound)
- Tweezers (for splinters, ticks, or stingers)
- Digital pet thermometer (normal dog temp: 99.5–102.5°F)
- Disposable gloves
- A muzzle or soft strip of cloth (even gentle dogs may bite when in pain)
- A small flashlight
- Instant cold packs
Medications (Vet-Approved Only)
- Any prescribed medications your dog currently takes
- Diphenhydramine (Benadryl) — only with vet-confirmed dosing for your dog’s weight
- Styptic powder (stops bleeding from broken nails)
- 3% hydrogen peroxide for vomiting induction, used only on direct veterinary instruction
Documents & Extras
- Copy of vaccination records
- Emergency contact card: your vet, the nearest emergency animal hospital, and ASPCA Poison Control
- A recent photo of your dog (helpful if they ever get lost during an emergency)
- An old towel or blanket (for warmth, or as a makeshift stretcher)
- A collapsible bowl and bottled water
Dog First Aid Kit Checklist at a Glance
| Category | Must-Have Items |
|---|---|
| Wound Care | Gauze, vet wrap, adhesive tape, antiseptic wipes, saline solution |
| Tools | Scissors, tweezers, thermometer, gloves, muzzle, flashlight, cold pack |
| Medications | Prescribed meds, vet-approved Benadryl, styptic powder |
| Documents | Vaccine records, emergency contacts, recent photo |
| Comfort | Towel/blanket, collapsible bowl, water |
Final Thoughts: Preparation Is Peace of Mind
Nobody wants to imagine their dog in danger — but the owners who prepare for it are the ones who handle it best. Building a first aid kit takes an afternoon. Learning CPR takes twenty minutes of reading (or better yet, a hands-on class). Both could someday mean the difference between a scary trip to the vet and a tragedy.
Take five minutes today: check your current supplies against the checklist above, save the emergency numbers in your phone, and maybe even practice locating your dog’s pulse points so you’re not fumbling if it ever really counts.
This article is intended for general educational purposes only and is not a substitute for professional veterinary advice, diagnosis, or treatment. Always consult a licensed veterinarian or emergency animal hospital for guidance specific to your dog’s condition.
If you have questions or expertise to share, please share it in the comments below. Our dogs deserve for us to know how to administer first aid for dogs.